Are you looking for a new woodturning cnc machine? As a beginner, are you worried about whether you can learn how to use it? We would say that, as long as there is a full set of practical tutorials, beginners can fully grasp how to operate.
When you use new cnc wood turning lathes for the first time, you need to install the woodturning tools on the machine before starting it.
In this post, we'll take you through the whole thing about how to install and adjust tools on a cnc wood lathe properly. Enjoy!
The three tools demonstrated in this tutorial are the tools that will be used in most cases. They are carbide woodturning cutters, HSS wood turning chisels, and the broaching bit.
After installing the tools, we need to adjust them. The adjustment here refers to adjusting the cutters to a proper height so we’ll get the best finish on the jobs.
Please watch the video tutorial here:
First Tool – Wood Lathe Carbide Tool Installation and Adjustment
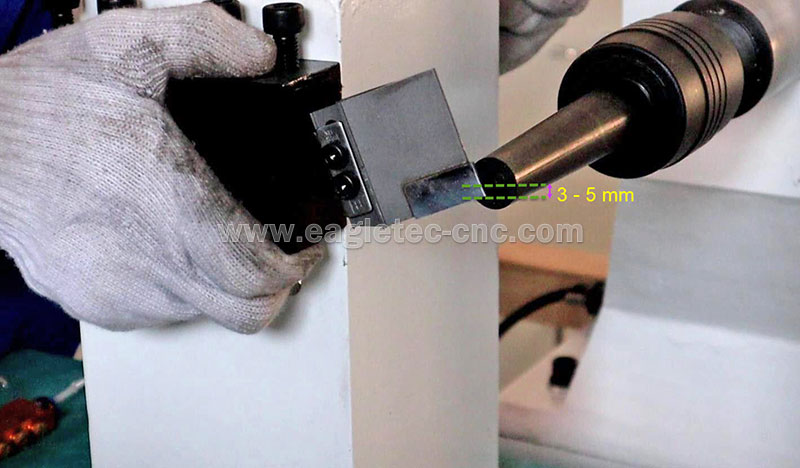
● Install the knife on the tool rest of the wood turning cnc machine.
● The blade is facing down; we adjust the height of the tool rest to make the tip of the tool is 3 to 5mm lower than the center of the thimble

● After adjustment, use screws to lock the position of the tool rest
● Complete
Second Tool - 3 in 1 Woodturning Chisel Installation and Adjustment
● Take out the knife
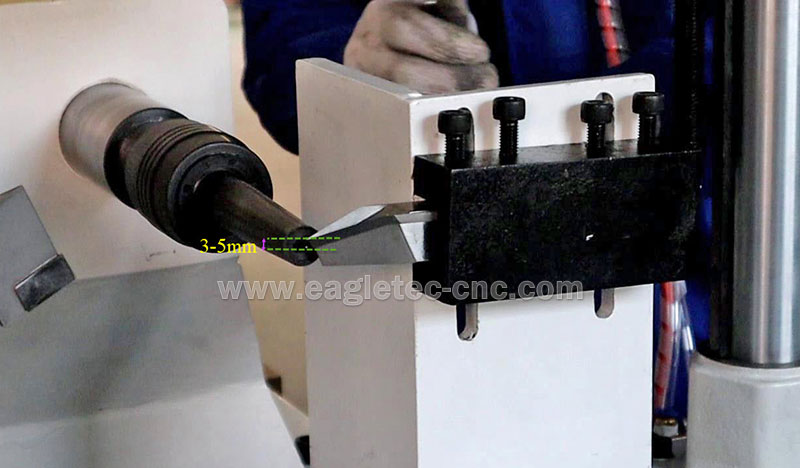
● Install the chisel on the tool rest
● The blade is facing up; we adjust the height of the tool rest to make the tip of the tool is 3 to 5mm higher than the center of the thimble

● After adjustment, use screws to lock the position of the tool rest
● Complete
Broaching Bit Installation and Adjustment
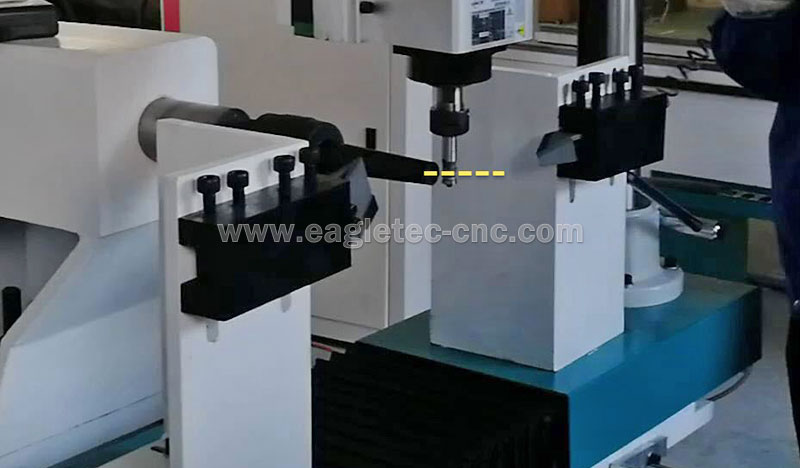
● Install the bit on the electronic spindle
● Activate the spindle, and it will fall down
● Adjust the universal bracket to make the tip of the bit the same height as the thimble's center

● Lock spindle height and adjust the spindle direction
● Complete
Are you seeking a new cnc lathe for wood now? Please click here.
See you next time.
Strongly recommended learn materials:
How to use CNC wood lathe part 2
How to use carbide wood lathe tools on a CNC wood lathe
How to use woodturning chisels properly
Original Post from EagleTec CNC
Copyright: original works, for permission to reproduce, reprint, please be sure to indicate the form of hyperlinks to the original source of the article, author information, and this statement.
Copyright © Jinan EagleTec Machinery Co., Ltd. All Rights Reserved | Sitemap